Time for a quick brain share.
My years of consulting have harvested some common questions that can quickly get to the point and help you as a consultant, understand what your client is in need of and then hopefully you are positioned to offer solutions to their needs.
Questions for IT
• How is your organization planning to handle the business expansion into new markets, retail locations, and product lines?
• Do you need to own data in private cloud or public cloud?
• What are your 2 biggest pain points?
Questions for CEO
• What are the top 2 or 3 initiatives of your company?
• What the top KPI’s that you use to manage your organization and what are you missing?
• You just acquired a new company what are the 2 biggest challenges of the acquisition?
• How do you view the (IT) dept's strategic role in the business.
• What are the root causes of deficiencies in culture of collaboration , delayed product launches, recruiting and customer service?
• Have you considered outsourcing any business functions?
Questions for the CFO
• What are you top 2 or 3 pain points?
• Is your current cost structure appropriate?
• Any compliance issues or concerns related to reporting and tax?
• What are the difficulties in your month-end close and reporting process?
Questions for VP of Operations
• What are 2 or 3 goals for company operations?
• What level of integration is planned into the current processes?
• Do you feel you have the resources today to accomplish this in the timeline desired?
• Do you or the organization have any preconceived opinions of NetSuite or other ERP solutions
• What are the top KPI’s you monitor to manage the business? Are you getting this information today?
• What do you think is the root cause of the issues?
Thursday, February 14, 2019
Friday, September 8, 2017
The Modern vs Standard SharePoint site nav disparity
References:
I have been struggling with this.
If you are an 'Explainer', then Please explain/comment/opine/discuss on the following navigation disparity.
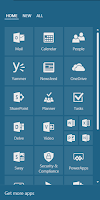 A user logs into their office.com tenant using their domain account, and they have a full app launcher experience.
 When a user selects the "SharePoint" app from the App Launcher tile, they are directed to the "SharePoint Home Screen" which is the new Modern landing page for Modern site creation, with News and sites that you are "Following".
There are two types of sites that a user can create from this page using the prominently links:
 The +Create button;
The Team & Communication site cards

 These 2 types of sites are both created using the prefix of "/sites/" or "/teams/" or whatever their SharePoint admin tenant setting "Site Creation" has been modified to, from inside the SharePoint Admin console.
 Any of the above sites created using the new +Create button:

I have been struggling with this.
If you are an 'Explainer', then Please explain/comment/opine/discuss on the following navigation disparity.
 A user logs into their office.com tenant using their domain account, and they have a full app launcher experience.
 When a user selects the "SharePoint" app from the App Launcher tile, they are directed to the "SharePoint Home Screen" which is the new Modern landing page for Modern site creation, with News and sites that you are "Following".
The URL for this landing page is: /_layouts/15/sharepoint.aspx
Any sites that you have "Followed" show up here as well as "Featured" sites that an Admin has added (Edit)
There are two types of sites that a user can create from this page using the prominently links:
The Team & Communication site cards

 These 2 types of sites are both created using the prefix of "/sites/" or "/teams/" or whatever their SharePoint admin tenant setting "Site Creation" has been modified to, from inside the SharePoint Admin console.
https://[tenant]-admin.sharepoint.com/_layouts/15/online/TenantSettings.aspx
A disparity in Functionality, URL and Navigation
The new Modern UI sites that are created in the above scenario are terrific, but there is a huge disconnect with the default SharePoint sites.
 Any of the above sites created using the new +Create button:
1) Do not show in the SharePoint admin console on the right >
2) Are NOT supported to open and customize in SharePoint Designer.
3) They do not show automatically in any site navigation,
including the standard SharePoint site nav.
including the standard SharePoint site nav.
4) Only these Modern sites are surfaced in the Graph and Delve.

The Standard SharePoint sites, at the base tenant [tenant].sharepoint.com have a totally different Site Creation mechanism.
To create a SubSite in here, you choose +New from Site Contents
Standard SharePoint sites have a Fully Customizable UI and can open in SharePoint Designer.
You can program the SharePoint home page as the starting point
Thursday, July 6, 2017
Office 365 Performance Readiness
When transitioning
to a cloud first strategy for their organization, many CIOs are reluctant to
consider infrastructure upgrades as a preliminary step in migrating from a
current On-premises server solution. We have created some guidelines to help
you prepare for an increase in internet traffic from your user base.
The benefits of
workloads on Office 365 over Hosted applications are clear.
- Best of class collaboration among employees scattered across various locations and geographical areas.
- Better productivity by using multiple devices to access applications.
- Great visibility on compliance reporting.
- Easier setup, little to zero end user maintenance from IT.
- IT resources are freed up from performing server and software upgrades, dealing with licensing from vendors, and general server management.
Your company will
experience an fairly significant increase in Internet based traffic. We see an
average 40 percent increase in internet traffic across most organizations. This
is because all Office 365
traffic is Internet based. You know that users can get to the internet in the
office, but your current Internet workloads may not be as heavily used as
Office 365 will be. For instance, Your SaleForce.com usage might be
representative of a very limited subset of employees. Simply increasing your
network capacity is not the panacea that will bring about any Networking
Nirvana.
Routing your desktop users through your
network firewalls, proxies and Internet gateways before sending them to Office
365 may just be limiting their experience and could have your end users
screaming at you. During the initial migration phases it is the internal
networking architecture limitations that’s one of the biggest challenges,
especially when users are initially synching their 50GB .ost file!
Readiness To Do
List:
- Read Microsoft's network performance guidance
- Upgrade your firewalls
- Increase bandwidth
- Run Office 365 Health, Readiness & Connectivity checks
- Model and test your network capacity or move to an Azure ExpressRoute for Office 365 circuit for a more predictable experience.
- Review your current Firewall software and revise its rules for Office 365.
Monday, August 1, 2016
Management Reporter SharePoint Integration
This post was originally written and published through my former employer McGladrey...
http://www.rsmusconsultingpros.com/how-to-integrate-management-reporter-reports-into-a-sharepoint-library/


http://www.rsmusconsultingpros.com/how-to-integrate-management-reporter-reports-into-a-sharepoint-library/
This article
describes how to integrate Management Reporter reports into a SharePoint
library.
Publishing your
Management Reporter 2012 reports to SharePoint is fairly straightforward to
configure.
When you generate a
report to your MR report library, you can also generate a link to a SharePoint
site or another network location. The related report link can open the report
in one of the supported report output types. (XPS, Excel, XBRL). Note that a lot of our clients ask for PDF
reports and honestly, you will be losing the rich drill down capability that
XPS or Excel supports. MS Word and PDF
file types can also be added using MR2012 CU8. As of this writing, CU10 was
made available Sept 2014
Each report library
location can create multiple related report links. Security settings for the
report library folder are applied when the related report link is opened.
NOTE: If you are using a computer that has Windows
Server® 2008 or Windows Server 2008 R2, you must have the Desktop Experience
feature turned on in order to post a report to a SharePoint site. Open Server
Manager, click Features, click Add Features, and then select Desktop
Experience. This may require a restart.
IE 10 is also a requirement.
SharePoint
Configuration
On the Management
Reporter server, go to Services and verify the name of the account that is
running the Management Reporter 2012 Process Service.
On the SharePoint
site, go to the document library that
you want to publish reports into and add
permissions for that Service Account with Contribute permissions.
Go to Library
Settings > Advanced Settings > and check Allow Management of Content
Types.
Go to Library
Settings >Content Types > and add Link To Document as an available
Content Type.
Management
Reporter Configuration
- In Report Designer, open the report to generate. Click the Output and Distribution tab.
- In the Output name field, enter a name for the report after it is generated. This name does not have to be the same as the report definition name.
- To view the report after it is generated, select the View report when generated check box.
- Select Generate to multiple report library locations.
- Click in the Report Library Location pane, and then enter the destination for the generated report. At least one report library location must be selected in order to generate a related report link.
- Double-click in the Related Report Link Location pane, and then type an address to a network location or a SharePoint site. You can also click Browse to browse to a destination folder, and then click OK to add the location to the report definition. These address paths can also be copied into or from other report definitions.

- Select the options to include in the report under the appropriate output heading
The
following table describes options that are available for all report output
types.

- If you want this report to be automatically published to SharePoint, You can setup a report schedule in Report scheduler
Viewing
reports in SharePoint
This is how users in
SharePoint will see the Reports:

When you click any
report, you can have the option of viewing it in Excel, Report viewer or XPS
document. You can also set a default view so that next time it won't ask for a
choice.
In MR version 2013 the reports will open
automatically in the Web Viewer from SharePoint links, Please assure a minimum
that IE10 is being used.
To not open automatically in WebViewer and
have the user choose, in Management
Reporter Report Designer if you go to Tools --> Options you can choose the
check box to use the native MR Report Viewer. If they don't have the MR Client installed on
the local workstation then the web would be the only option. If using version 2.1.1.1030.2
without RU6, this option is not available.
Friday, March 4, 2016
Office 365 tenant name
You're stuck with it.

Unless the O365 team provides a support feature to change or add to your default tenancy name, the initial tenancy name that you choose on the sign up screen will be the same and only URL that works for all browser based sign on sites including SharePoint, OneDrive, Outlook, etc.
I bet you all think this doesn't happen a lot but I think I can name about 50 tenancy's like BrandName1.sharepoint.com right now and I can see plenty of room for;
You should utilize the 6 P's of O365 on boarding and migrations.
Then check the names she suggests while on the phone with her using... PowerShell to the rescue!
http://pastebin.com/raw/5Y0dXnEa
Copy and Save the code with a meaningful name and run as such: :
Shout Out to Microsoft Engineer Aaron Dinnage with his awesome parenting post:
https://www.linkedin.com/pulse/how-check-office-365-tenant-name-availability-aaron-dinnage

Unless the O365 team provides a support feature to change or add to your default tenancy name, the initial tenancy name that you choose on the sign up screen will be the same and only URL that works for all browser based sign on sites including SharePoint, OneDrive, Outlook, etc.
I bet you all think this doesn't happen a lot but I think I can name about 50 tenancy's like BrandName1.sharepoint.com right now and I can see plenty of room for;
- 'Oops, I typo'ed it'
- 'I thought we could change it later'
- 'Had I known that I couldn't change it, I would have stopped right there'
You should utilize the 6 P's of O365 on boarding and migrations.
Proper Planning Prevents Piss Poor Performance
Ask your client "Are you OK with this tenant name for ever and ever, through sickness and health?Then check the names she suggests while on the phone with her using... PowerShell to the rescue!
http://pastebin.com/raw/5Y0dXnEa
Copy and Save the code with a meaningful name and run as such: :
Get-TenantStatus.ps1 -name "leekspin"This displays either "Taken" or "Available" ...so try putting your ex girlfriend's name in there.
Shout Out to Microsoft Engineer Aaron Dinnage with his awesome parenting post:
https://www.linkedin.com/pulse/how-check-office-365-tenant-name-availability-aaron-dinnage
Monday, October 19, 2015
O365 - Explorer Views & Mapped Drives
Users who are comfortable with Windows Explorer and the inherent ease of drag/drop & expanding tree structures will find using a SharePoint Library in a traditional “Explorer View” to be more familiar to them and easier to work with than SharePoint default libraries and metadata. Although the latter provides a world of search and display benefits, the former is an everyday familiarity use case for some.
Using Explorer View works especially well in Windows 10 where you have joined your company's Azure Active Directory.
Yes there are two paths you can go by …
1. Open the Library in Explorer view each time you want to view it.
2. Map a drive from Windows explorer for continued access to the Library.
b. Open a document library in Explorer View.
c. From your Team Site, go into your Document Library.
d. Under the Library Tools section in the Ribbon, click the Library tab.
e. In the Actions group, click Open with Explorer and Explorer should now Launch.
a. Sign in to the SharePoint Online site by using your Office 365 credentials. Make sure that you click to select the Keep me signed in check box.
b. Open a document library in Explorer View as above – we need to do this to obtain the URL.
c. From your Team Site, select your Document Library.
d. Under the Library Tools section in the Ribbon, click the Library tab.
e. In the Actions group, click Open with Explorer.
f. Explorer should now Launch with your chosen Library
g. Right-click and Copy the URL from the Explorer window
h. From the tools menu click Map Network Drive.
i. Click the Connect to a Web site that you can store your documents and pictures link, and then click Next two times.
j. Paste the site URL, click Next, and then follow the instructions in the wizard.
For example: https://mycompany.sharepoint.com/Documents
This location will now be added as a Network Location in Windows Explorer
Note: You may need to enable the tools menu on Windows 7
1. Open a Windows Explorer window.
2. Click on Organize and Layout. (See screenshot below)
3. To Enable the Menu Bar
4. Click on Menu Bar to check it.
a. User Internet Explorer and Sign in to the SharePoint Online site by using your Office 365 credentials. Make sure that you click to select the Keep me signed in check box.
b. Open a document library in Explorer View as above – we need to do this for the URL.
c. From your Team Site, select your Document Library.
d. Under the Library Tools section in the Ribbon, click the Library tab.
e. In the Actions group, click Open with Explorer.
Explorer should now Launch with your chosen Library
f. Right-click and Copy the URL from the Explorer window
g. From the tools menu click Map Network Drive.
h. Click the Connect to a Web site that you can store your documents and pictures link, and then click Next two times.
i. Paste the site URL, click Next, and then follow the instructions in the wizard. For example, https://mycompany.sharepoint.com/Documents
This location will now be added as a Network Location in Windows Explorer
Note: You may need to enable the tools menu on Windows 8
1. Open a Windows Explorer window.
2. Click on Organize and Layout. (See screenshot below)
3. To Enable the Menu Bar
4. Click on Menu Bar to check it.
a. User Internet Explorer and Sign in to the SharePoint Online site by using your Office 365 credentials. Make sure that you click to select the Keep me signed in check box.
b. Open a document library in Explorer View as above – we need to do this to obtain the URL.
c. From your Team Site, select your Document Library.
d. Under the Library Tools section in the Ribbon, click the Library tab.
e. In the Actions group, click Open with Explorer.
Explorer should now Launch with your chosen Library
f. Right-click and Copy the URL from the Explorer window
g. From the tools menu click Map Network Drive.
h. Click the Connect to a Web site that you can store your documents and pictures link, and then click Next two times.
i. Paste the site URL, click Next, and then follow the instructions in the wizard.
For example, https://mycompany.sharepoint.com/Documents
This location will now be added as a Network Location in Windows Explorer
Note: You may need to enable the tools menu on Windows 8
1. Open a Windows Explorer window.
2. Click on Organize and Layout. (See screenshot below)
3. To Enable the Menu Bar
4. Click on Menu Bar to check it.
Known Issues include:
1. Internet Explorer 10 (32 bit) on Windows 7 - does not work
2. Internet Explorer (64 bit) - does not work
3. Mapped drives will timeout after 8 hours
Troubleshooting Suggestions from Microsoft
How to troubleshoot mapped network drive issues
When using Open with Explorer, make sure that you are using IE 7 through 9 in the 32-bit version.
Note: IE 10 on Windows 7 is not fully compatible with some of the SharePoint Online features, but IE 10 is compatible on Windows 8.
Try running IE 10 in compatibility mode.
Make sure that you have lowered UAC to the lowest setting. For more information on UAC and how to change its settings, please refer to the below URL:
http://windows.microsoft.com/en-us/Windows7/What-are-User-Account-Control-settings
Ensure that you have added the following URLs to your Trusted Sites zone in IE:
In your IE browser, select the "Tools" option (alt + x) and select "Internet Options" from the drop-down menu.
1. Select the "Security" tab.
2. Click on "Trusted Sites"
3. Click on the "Sites" button
4. Add the following sites:
https://*.sharepoint.com
https://*.microsoftonline.com
5. Click close and OK
In the Trusted Sites zone in IE, make sure that Enabled Protected Mode is unchecked.
Make sure that IE is passing through your credentials correctly:
In IE, select the "Tools" option (alt + x) and select "Internet Options" from the drop-down menu.
1. Select the "Security" tab.
2. Select "Custom level."
3. From here, scroll all the way down to the bottom to the "User Authentication" section.
4. Under the "Logon" section, choose the "Automatic logon with current username and password" option.
5. Select "ok."
When you are signing in to SharePoint, make sure that you are checking the option to use Keep Me Signed In.
1. Navigate to https://portal.onmicrosoft.com
2. When signing into the portal, check the option for "Keep me signed in."
3. Log in.
4. This will apply the settings needed.
Also, there may be third-party add-ins in IE which are interfering with the Open with Explorer feature.
It might be a good idea to reset IE back to its default settings by performing the following:
1. Open Internet Explorer.
2. Click Tools, in Internet Explorer 9 or above it is a gear icon located in the upper-right hand corner of the screen, and then click Internet Options.
3. Click the Advanced tab.
4. Under Reset Internet Explorer Settings, click Reset.
5. Select the Delete personal settings check box to remove browsing history, search providers, Accelerators, home pages, Tracking Protection, and ActiveX Filtering data.
Note: You will need to set-up your homepage again. However, your favorites will not be deleted
6. Exit Internet Explorer and then restart the program again as the changes will take effect once the browser is restarted.
Using Explorer View works especially well in Windows 10 where you have joined your company's Azure Active Directory.
Yes there are two paths you can go by …
1. Open the Library in Explorer view each time you want to view it.
2. Map a drive from Windows explorer for continued access to the Library.
Open in Windows Explorer
Before you map a network drive, follow these steps to Open in Windows Explorer
a. In Internet Explorer - Sign in to the SharePoint Online site by using your Office 365 creds. Make sure that you select the Keep me signed in check box. That little step is important.b. Open a document library in Explorer View.
c. From your Team Site, go into your Document Library.
d. Under the Library Tools section in the Ribbon, click the Library tab.
e. In the Actions group, click Open with Explorer and Explorer should now Launch.
Mapping a network drive
Windows 7
To map a network drive to a SharePoint Online site, follow these steps:a. Sign in to the SharePoint Online site by using your Office 365 credentials. Make sure that you click to select the Keep me signed in check box.
b. Open a document library in Explorer View as above – we need to do this to obtain the URL.
c. From your Team Site, select your Document Library.
d. Under the Library Tools section in the Ribbon, click the Library tab.
e. In the Actions group, click Open with Explorer.
f. Explorer should now Launch with your chosen Library
g. Right-click and Copy the URL from the Explorer window
h. From the tools menu click Map Network Drive.
i. Click the Connect to a Web site that you can store your documents and pictures link, and then click Next two times.
j. Paste the site URL, click Next, and then follow the instructions in the wizard.
For example: https://mycompany.sharepoint.com/Documents
This location will now be added as a Network Location in Windows Explorer
Note: You may need to enable the tools menu on Windows 7
1. Open a Windows Explorer window.
2. Click on Organize and Layout. (See screenshot below)
3. To Enable the Menu Bar
4. Click on Menu Bar to check it.
Windows 8/8.1
To map a network drive to a SharePoint Online site, follow these steps:a. User Internet Explorer and Sign in to the SharePoint Online site by using your Office 365 credentials. Make sure that you click to select the Keep me signed in check box.
b. Open a document library in Explorer View as above – we need to do this for the URL.
c. From your Team Site, select your Document Library.
d. Under the Library Tools section in the Ribbon, click the Library tab.
e. In the Actions group, click Open with Explorer.
Explorer should now Launch with your chosen Library
f. Right-click and Copy the URL from the Explorer window
g. From the tools menu click Map Network Drive.
h. Click the Connect to a Web site that you can store your documents and pictures link, and then click Next two times.
i. Paste the site URL, click Next, and then follow the instructions in the wizard. For example, https://mycompany.sharepoint.com/Documents
This location will now be added as a Network Location in Windows Explorer
Note: You may need to enable the tools menu on Windows 8
1. Open a Windows Explorer window.
2. Click on Organize and Layout. (See screenshot below)
3. To Enable the Menu Bar
4. Click on Menu Bar to check it.
Windows 10
To map a network drive to a SharePoint Online site, follow these steps:a. User Internet Explorer and Sign in to the SharePoint Online site by using your Office 365 credentials. Make sure that you click to select the Keep me signed in check box.
b. Open a document library in Explorer View as above – we need to do this to obtain the URL.
c. From your Team Site, select your Document Library.
d. Under the Library Tools section in the Ribbon, click the Library tab.
e. In the Actions group, click Open with Explorer.
Explorer should now Launch with your chosen Library
f. Right-click and Copy the URL from the Explorer window
g. From the tools menu click Map Network Drive.
h. Click the Connect to a Web site that you can store your documents and pictures link, and then click Next two times.
i. Paste the site URL, click Next, and then follow the instructions in the wizard.
For example, https://mycompany.sharepoint.com/Documents
This location will now be added as a Network Location in Windows Explorer
Note: You may need to enable the tools menu on Windows 8
1. Open a Windows Explorer window.
2. Click on Organize and Layout. (See screenshot below)
3. To Enable the Menu Bar
4. Click on Menu Bar to check it.
Troubleshooting & Known Issues
Note: There are some known issues with Mapping network drives.Known Issues include:
1. Internet Explorer 10 (32 bit) on Windows 7 - does not work
2. Internet Explorer (64 bit) - does not work
3. Mapped drives will timeout after 8 hours
Troubleshooting Suggestions from Microsoft
How to troubleshoot mapped network drive issues
When using Open with Explorer, make sure that you are using IE 7 through 9 in the 32-bit version.
Note: IE 10 on Windows 7 is not fully compatible with some of the SharePoint Online features, but IE 10 is compatible on Windows 8.
Try running IE 10 in compatibility mode.
- Open Internet Explorer.
- Press the Alt key to display the Menu bar (or right-click the Address bar and then select Menu bar).
- Tap or click Tools, and then tap or click Compatibility View settings.
Make sure that you have lowered UAC to the lowest setting. For more information on UAC and how to change its settings, please refer to the below URL:
http://windows.microsoft.com/en-us/Windows7/What-are-User-Account-Control-settings
Ensure that you have added the following URLs to your Trusted Sites zone in IE:
In your IE browser, select the "Tools" option (alt + x) and select "Internet Options" from the drop-down menu.
1. Select the "Security" tab.
2. Click on "Trusted Sites"
3. Click on the "Sites" button
4. Add the following sites:
https://*.sharepoint.com
https://*.microsoftonline.com
5. Click close and OK
In the Trusted Sites zone in IE, make sure that Enabled Protected Mode is unchecked.
Make sure that IE is passing through your credentials correctly:
In IE, select the "Tools" option (alt + x) and select "Internet Options" from the drop-down menu.
1. Select the "Security" tab.
2. Select "Custom level."
3. From here, scroll all the way down to the bottom to the "User Authentication" section.
4. Under the "Logon" section, choose the "Automatic logon with current username and password" option.
5. Select "ok."
When you are signing in to SharePoint, make sure that you are checking the option to use Keep Me Signed In.
1. Navigate to https://portal.onmicrosoft.com
2. When signing into the portal, check the option for "Keep me signed in."
3. Log in.
4. This will apply the settings needed.
Also, there may be third-party add-ins in IE which are interfering with the Open with Explorer feature.
It might be a good idea to reset IE back to its default settings by performing the following:
1. Open Internet Explorer.
2. Click Tools, in Internet Explorer 9 or above it is a gear icon located in the upper-right hand corner of the screen, and then click Internet Options.
3. Click the Advanced tab.
4. Under Reset Internet Explorer Settings, click Reset.
5. Select the Delete personal settings check box to remove browsing history, search providers, Accelerators, home pages, Tracking Protection, and ActiveX Filtering data.
Note: You will need to set-up your homepage again. However, your favorites will not be deleted
6. Exit Internet Explorer and then restart the program again as the changes will take effect once the browser is restarted.
Thursday, September 24, 2015
MMC cannot open the file
MMC cannot open the file C:\Windows\system32\taskschd.msc
Well, that stinks...I just had it open yesterday.
This is a known bug in certain versions of Windows 2008 or 2008 R2
To Fix:
Open Explorer and go to directory:
C:\Users\USERNAME\AppData\Roaming\Microsoft\MMC\
and delete the taskschd file, (it has no file extension).
Or if you are Nervous Nellie, just rename it.
run taskscd.msc again and voila! It opens.
Monday, August 17, 2015
How to enable automatic opening of Office documents from SharePoint for Chrome, I.E. & FireFox
And you may ask yourself...
Why am I unable to open documents in SharePoint?
I see this browser message when trying to open Office documents from SharePoint...
I see this browser message when trying to open Office documents from SharePoint...

Well, the first part of the pop up message is true, you do have a version of Excel installed.
The reason you are seeing this is because second part of the message is false for you; your browser is misconfigured! You will need to enable two Browser Helper Objects in Internet Explorer, or use an AddOn for Chrome or FireFox.
How to enable automatic opening of Office documents from SharePoint for Chrome, IE & FireFox.
Instructions for Internet Explorer:
- Open Internet Explore open the Tools menu by click Alt-T (or click the gear icon)
- Choose Internet Options (or press o)
- Choose the Programs Tab
- Click the Manage add-ons button
- Scroll to the Microsoft Corporation section
- Highlight SharePoint OpenDocuments Class and assure it is enabled.
- Highlight the Office Document Cache Handler and assure it is enabled
- Click Close
- Refresh your webpage and you will now be able to open documents in your full MSOffice rich client application from within SharePoint when prompted.
Instructions for Chrome:
You will need to install the add-on IETab
- Get the Add On by searching add-ons for IETab, or here: https://chrome.google.com/webstore/detail/ie-tab/hehijbfgiekmjfkfjpbkbammjbdenadd?hl=en
- Click Add To Chrome
- A new IE folder icon will appear at the end of the URL address area in the browser

Instructions for FireFox:
Similar to Chrome IE-Tab, you will need to install the Add-On IE-TAB https://addons.mozilla.org/en-us/firefox/addon/ie-tab/
Thursday, February 12, 2015
You have reached the maximum resource usage limit
Our organization's
O365 tenancy has a lot of Global Administrators.
Global admins have
the ability to set among other things, SharePoint Site Collection Storage
Quotas and the often misunderstood Server Resource Quota.
There has been misunderstood thought that by increasing this setting to some really big number, their
site collection will have blazingly fast performance and every other site
collection will chug along at their slow dial-up rate.
This is not at all
true, and in fact you can really mess things up by setting these numbers too high.
Consider this:
A Site Collection is
created and then assigned a huge number of resources. Then it is deleted.
This happens a few
times and before long, your SharePoint Admin Center displays this ugly
error and you are unable to manage resources on any of the collections.
You have reached the maximum resource usage limit. - Well dang!

And... you can't increase or decrease any site collection resource! Sort of a Catch 22, right? So you decide to start deleting site collections thinking this might help!

The deleted collection is in the Site Collection Recycle bin. Those resources are not reallocated just because you deleted it. They are still awaiting to be purged and those resources need to stay allocated until then.
So what do you do?
PowerShell to the
rescue!
Here is what we had
to do to return our site back to normal.
First, query the
site owners and ask if they have any sandboxed or custom code on their sites
and need those extra resources to debug or step thought their code.
If they do, understand their burden and pity them. Leave them to their debugging, and focus on the deleted sites and the sites where there is no custom code.
If they do, understand their burden and pity them. Leave them to their debugging, and focus on the deleted sites and the sites where there is no custom code.
Then fire up a
SharePoint Online or Azure PowerShell command prompt and connect to your admin
portal,
connect
spo-service http://contoso-admin.sharepoint.com
…notice the -admin, it’s the URL of the admin portal.
Authenticate with a
Global Admin account.
Open the admin console and look in the Site Collection recycle bin:

Grab the URL of a
deleted site.
Then delete it, with
extreme prejudice.
Remove-SPODeletedSite
-Identity [URL of site in recycle bin]
Do this for each
site in the recycle bin.
When that’s done,
the ugly error "You have reached the maximum blah blah" and red bar
ought to go away!
Nbow you need to
attempt to set the resource quota for one of those collections that are set to
some large number.
You might try
reassigning it in the admin portal, but what fun is that? You still have that
console open, so…
Set-SPOSite
-Identity https://BigSite/sites/ituneslibrary -ResourceQuota 300
Now all should be
right in the world.
The resource usage quota is a site collection
metric calculated by SharePoint Online. The main purpose of resource quotas is
to limit the risk that sand-boxed custom code can have on available resources
on a site collection, bad code causing excessive CPU use for example.
The actual resource
quota used to be determined by the number of user seats in your company's
subscription (#seats×200) +300 (may have changed now).
So for a 10 seat
license, the resource quota would be 2300 split across all site collections you
own.
HopeThisHelps,
John
Wednesday, October 15, 2014
Migrations from the Crypt
Despite what each 3rd party SharePoint Migration software company tells you, you may need to use a combination of tools to successfully migrate and overcome the limitations of each tool. On top of that, there are just some things that won’t migrate.
I am currently presenting these limitations and how to effectively use any and all of the available migration tools as well as Azure-PowerShell, iTunes, Peapod and your wits to get your migration accomplished with success.
Tuesday 6pm Portland ME
SharePoint Maine User Group
I am currently presenting these limitations and how to effectively use any and all of the available migration tools as well as Azure-PowerShell, iTunes, Peapod and your wits to get your migration accomplished with success.
Tuesday 6pm Portland ME
SharePoint Maine User Group


Monday, September 29, 2014
Auto-Tune and issues downloading large files form SharePoint Online
Some O365 clients may experience errors or disconnects or slowness with uploading/downloading large (>10MB) files from SharePoint Online. There is a workaround on client side. Need to disable Auto-Tune.
This will stay at some small % for a long time :

Then eventually:

To fix this, from a command prompt ->
netsh int tcp set global autotuninglevel=disabled
Shout out: http://sharepoint-community.net/profiles/blogs/o365-sharepoint-online-not-able-to-download-upload-large-file
This will stay at some small % for a long time :
To fix this, from a command prompt ->
netsh int tcp set global autotuninglevel=disabled
Shout out: http://sharepoint-community.net/profiles/blogs/o365-sharepoint-online-not-able-to-download-upload-large-file
Friday, September 26, 2014
Resolve Sync issues with OneDrive for Business
I recently had an issue that I still do not understand the root cause of.
My OneDrive for Business folder was not syncing and certain files displayed with a red X icon, instead of the happy green Synced icon.
I Uninstalled/Reinstalled 1D4B but still had the issue.
I also found some un-synced files in the Archive folder at:
C:\Users\John Mongell\OneDrive for Business Archives\Thursday, September 25, 2014 - 1\OneDrive
Whats more, each time I tried to access the 1D4B folder in Windows Explorer, a popup for each file would quickly appear and disappear: It said OneDrive for Business is not responding. Try again in a few minutes.
So, At last, I surfed to the file location C:\Program Files\Microsoft Office 15\root\office15
And typed Groove.exe /clean /all Then I restarted Groove (OneDrive) by simply typing groove.exe
This caused it to start correctly and asked me to resync my local library.
I confirmed the file locations and resynced, all is good now!
Hope This Helps.
Wednesday, June 25, 2014
MCSE and MCSD SharePoint Certifications
"Yes, there are 2 paths you can go by, but in the
long run, there's still time to change the road you're on."
- Robert Plant
Recertification exam every three years.
Step
|
Title
|
Optional training
|
Required exam
|
1
|
Installing and
Configuring Windows Server 2012
|
||
2
|
Administering
Windows Server 2012
|
||
3
|
Configuring
Advanced Windows Server 2012 Services
NOTE : After successfully completing steps 1-3, you'll earn a Microsoft Certified Solutions Associate (MCSA): Windows Server 2012 certification. |
||
4
|
Core Solutions
of Microsoft SharePoint Server 2013
|
||
5
|
Advanced
Solutions of Microsoft SharePoint Server 2013
|
Recertification exam every two years.
Step
|
Title
|
Optional training
|
Required exam
|
|
1
|
Programming in
HTML5 with JavaScript and CSS3
|
|||
2
|
Developing
ASP.NET MVC 4 Web Applications
|
|||
3
|
Developing
Microsoft SharePoint Server 2013 Core Solutions
|
|||
4
|
Developing
Microsoft SharePoint Server 2013 Advanced Solutions
|
Also, there is
this MCSD cert for SharePoint Apps.
Recertification exam every two years.
Step
|
Title
|
Optional training
|
Required exam
|
|
1
|
Programming in
HTML5 with JavaScript and CSS3
|
|||
2
|
Developing
ASP.NET MVC 4 Web Applications
|
|||
3
|
Developing
Microsoft Azure and Web Services
|
GOOD LUCK
Friday, June 20, 2014
SharePoint External Sharing Explained
What are the external sharing features of SharePoint ?
• The ability to share sites and documents with authenticated users.
Authenticated users are those who are invited to sign in by using a Microsoft account or Office 365 user ID.
• The ability to share sites and documents with guest users.
Guest users, also called anonymous users, don’t need a Microsoft account or Office 365 user ID to access your sites and documents. They access via guest links that you or your employees give to them.
• The ability to turn external sharing on or off globally for an entire SharePoint Online environment (or tenant).
Turning external sharing off at the tenant level means no documents, sites, or site collections can be shared externally.
• The ability to turn external sharing on or off for individual site collections.
This provides you with the ability to secure content on specific site collections that you do not want to be shared.
Reference:
Share sites or documents with people outside your organization.
There are three ways that you can do this:
• You can share an entire site by inviting external users to sign in to your site using a Microsoft account or Office 365 user ID.
• You can share individual documents by inviting external users to sign in to your site using a Microsoft account or Office 365 user ID.
• You can post or send users a guest link that they can use to view individual documents on your site anonymously.
Reference:
Tuesday, May 6, 2014
Forcibly Remove an Office 365 SharePoint Site
Lets say you have created a SharePoint online site-collection and then (purposely) deleted the site-collection and quickly need to recreate it using the same name.
...
I know...don't judge me..it was a perfectly logical outcome of the circumstance. ;-p
In order to recreate the URL the same within 48 to 72 hours, you will need to use the SharePoint Azure Powershell command utility to Forcibly delete the site collection out of the Recycle Bin with Extreme Prejudice.
1. Connect to your admin portal site
Type connect-msolservice
…and log in with your admin account
Remember it is important to connect to the admin site:
yoursite-admin.sharepoint.com
2. Delete with Extreme Prejudice
Remove-SPODeletedSite -Identity https://contoso.sharepoint.com/sites/sitetoremove
Cheers!
Wednesday, April 16, 2014
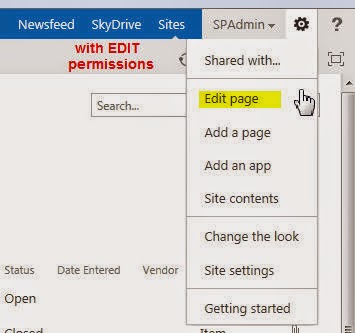
Edit vs Contribute permission Best Practices
 When you create a new SharePoint site and allow the 'Site Wizard' to set up Groups for the site, it will create 3 new groups including a 'Members' group.
The new group creation page clearly states: Members can Contribute content to the Web site.
So you would expect that the group has Contribute right, yes?
Before you add people to this group, I STRONGLY RECOMMEND that you go into Site Permissions and see that the Wizard has just lied to you!
He has set your Members group to the Edit permission level.
There is a pretty subtle, yet potentially enormous difference between these levels.
- Edit means you can have CRUD operations on entire lists and pages.
- Contribute means you don't and can only add and delete items.

Lets see what your users will experience...

These users cannot edit a page and potentially delete your web parts!
And these users can!
These are the Ribbon commands differences.

A BEST PRACTICE would be to immediately CHANGE the permission level for the Members Group to Contribute, then add users to that group and then add another Permission Group called Department Site Editors that have this Edit permission level and add your PowerUsers to that group.
If your Power users are Site Owners then you don not need to create a Editors group.
Tuesday, April 15, 2014
Using OneDrive for Business Step by Step
A Step by Step guide to setting up your 1D4B sync on Win7 and the end user experience with setting this up.
Click the OneDrive link in your SharePoint or Office365 navigation bar.
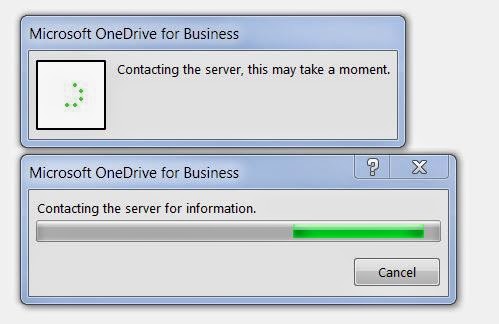
Now...Go ahead and Press SYNC... and prepare for a wild ride!

You will see a few 'Working on it' type popup messages like this one...

and this one...

OK. User interaction time!
You will need to click Sync Now button above to "Release the hounds"

Finally... you see a shiny new Explorer Favorites icon for One Drive for Business with your files.

You are ready to work offline. When you update content in these folders, they will auto sync to the cloud if you are connected to the interweb thingy. Thanks to Ray Ozzie and GROOVE.EXE !
Click the OneDrive link in your SharePoint or Office365 navigation bar.
Now...Go ahead and Press SYNC... and prepare for a wild ride!
You will see a few 'Working on it' type popup messages like this one...
and this one...
Now, this last one.
You will need to click Sync Now button above to "Release the hounds"
Depending on how much content you have in your Documents library, it can take a few minutes to SYNC it all. If your online library is empty it should only take a minute or 2.
Finally... you see a shiny new Explorer Favorites icon for One Drive for Business with your files.
You are ready to work offline. When you update content in these folders, they will auto sync to the cloud if you are connected to the interweb thingy. Thanks to Ray Ozzie and GROOVE.EXE !
Subscribe to:
Posts (Atom)